As you start out your journey with gardening, you will no doubt notice that there are literally hundreds if not thousands of varieties of edible plant life out there. You’ll probably even discover that a few plants that you see in your own yard growing wild are actually edible, like wild “invasive” dandelion. Did you know that many mothers would send their kids out during the great depression to harvest dandelion greens so that they could have some extra food for their tables? We’ve been so convinced by this big agricultural industry that a wild growing plant which is edible, should be eradicated with toxic chemical. It’s literally free and plentiful, but they’ve convinced a few generations now that you need a pristine lawn.
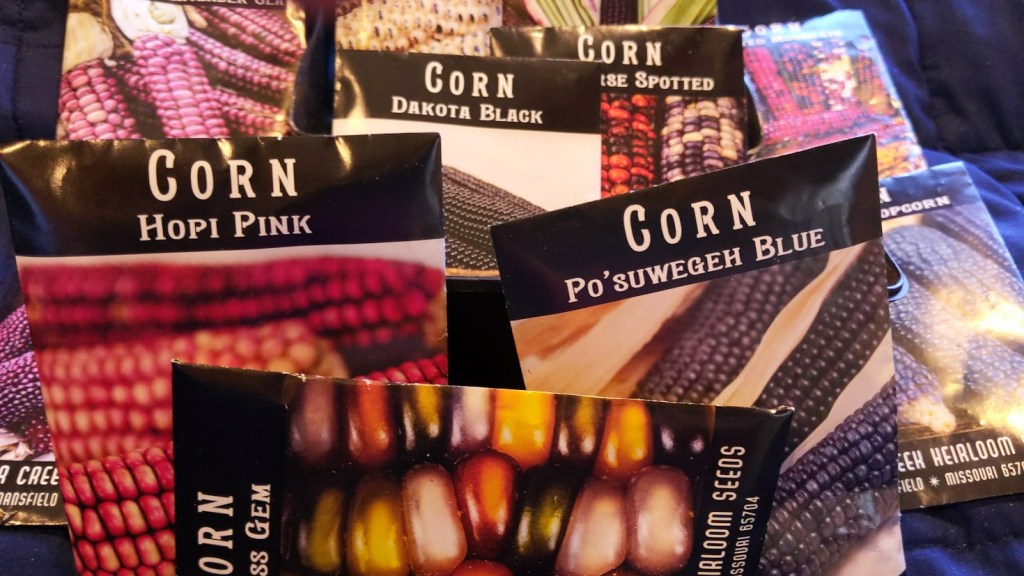
My seed keeping started with a simple 4×6 index card box but as I gathered more seeds I realized I was going to need something more. So, I brought a second 4×6 index card box and filled that one as well. I have an entire 4×6 box dedicated to rare and heirloom varieties of just corn. Not any old corn but beautiful Hopi Pink Corn, Mini Blue Popcorn and Glass Gem Corn. The more you follow the white rabbit down the hole, the more you come to realize that seed saving is more than just saving vegetable or flower seeds for next season. It’s an act of rebellion against an ever destructive and consuming beast that wants to eliminate unique species of plant life. It may sound as if I am over reacting, but hundreds of gardeners today are single handedly saving the lives of numerous plant species from being exterminated.
Since the 1900’s, we’ve lost an estimated 75% of plant biodiversity on earth, which means there are varieties that could have had powerful healing and nutritional capabilities that have been lost to us forever. Here in Florida, we are struggling to cope with the enormous efforts needed to control and eradicate numerous invasive species. Whether it’s in the surrounding oceans, native marshlands, or even the Florida animal kingdom, we are battling a war to save what we can. Did you know that we have active programs where you can get paid to hunt invasive pythons and lion fish? You can check out the UF website to get the information on plants, trees, wildlife and more.
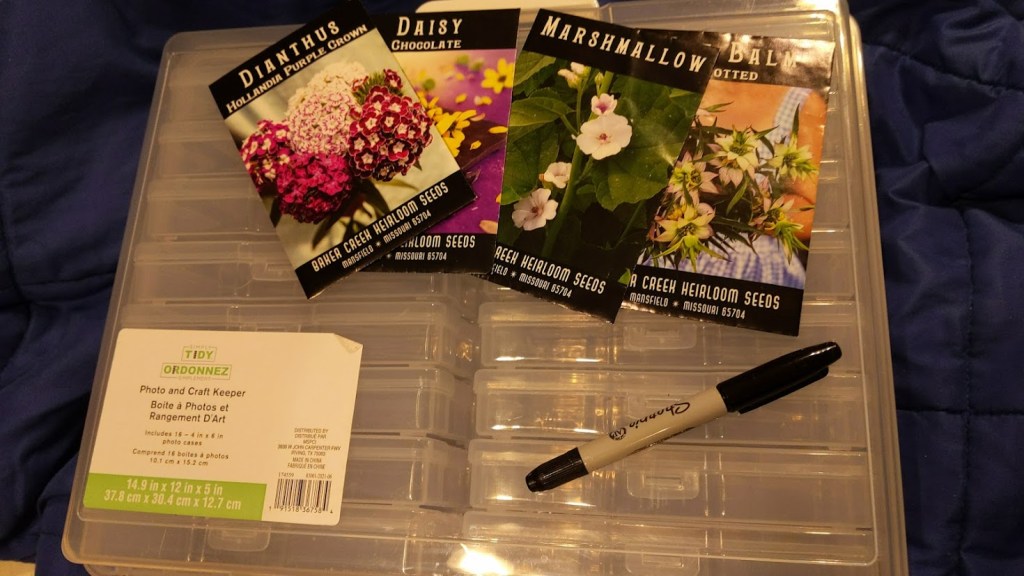
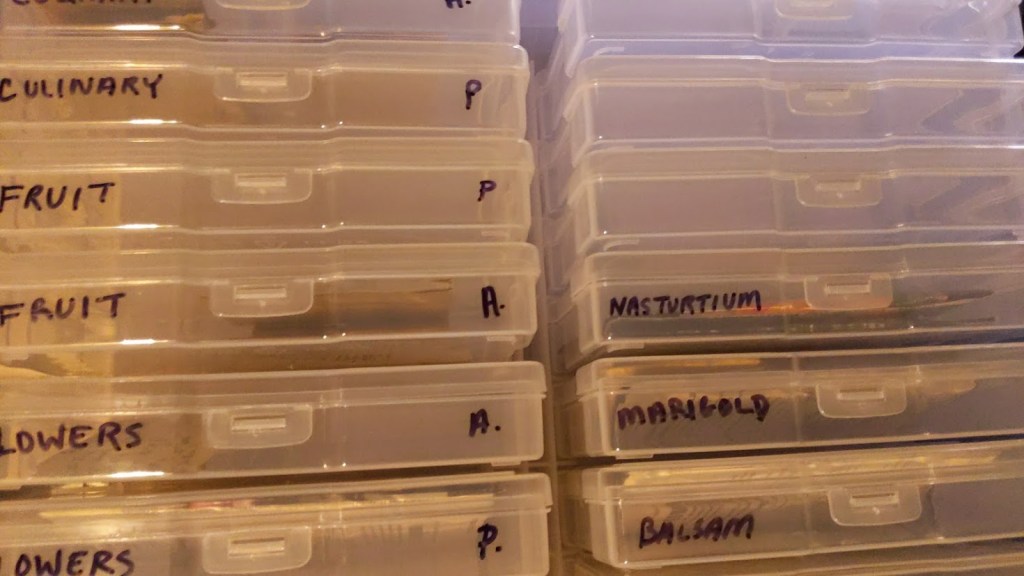
See? I told you the rabbit hole goes deep. But, let’s reverse and go back to strictly saving seeds for personal use. If you are just a beginner, I’d recommend you keeping your seed packets in a 4×6 box in a cold, dark location like a closet. If you decide that you want to move beyond just growing things for yourself, you can try purchasing a folder with inserts big enough to hold seed packets. Now me, I’ve moved onto the big honkin’ photo storage keeper so I can break seeds down into categories which allows for easier seed searching. I simply started breaking the seeds I currently have down into categories to determine what I will most likely need in the future, even going as so far as having on index box for annuals and one for perennials. I haven’t really stepped into growing biennials yet, but I may give them their own space down the road.
If you plan to just buy organic fruit from the store or seedlings from a local business, you will no doubt need to know what’s involved in properly saving seeds for future seasons. There are numerous videos, articles and blogs out there describing how to save seeds properly to avoid mold and rotting.
My general rule of thumb is for lettuces, kale, spinach and any leafing plant, simply allow it to go to flowering and gather them for drying. You can tie the stems together with some kitchen twine and throw a brown lunch sack over them to catch any seed that falls out on it’s own. Once it’s dry, simply give the bag a couple shakes and carefully take out the dried stems to inspect any remaining seeds that might be stuck. Be sure to write not only on the paper sack, but the package that will hold the final seeds.
If you are saving a species of pepper, you can either let the pepper dry on the plant or cut it open and take the seed cluster out to dry on a paper towel or paper plate. Once dried you can toss the seeds in your chosen package and label accordingly. If you are working with spicy peppers, make sure that you are wearing a pair of gloves and you thoroughly clean up the work area once you are done.
The most kooky seeds to save are cucurbits due to the mucilaginous coating that looks like clear snot. Many believe that the reason these seeds specifically are coated, is so that they can pass through the digestive system somewhat unharmed so they can be deposited in the ground for more seeds to grow. These seeds are found in cucumbers, tomatoes, summer squash, winter squash, watermelons, cantaloupe, honeydew and some gourds. Great care must be taken with these seeds as these have a higher moisture content and must be fermented in order to remove the mucus coating. Simply scoop out the guts, place in a jelly jar and fill halfway with water. Allow this mixture to sit out on your countertop away from light for approximately two to three days for proper fermentation. Once fermented, simply use a large spoon to remove any solids or floating seeds, which are not viable for seed saving. Next, you want to use a small strainer and strain out the remaining viable seeds. Hold the strainer under running water while your give the seeds a decent final wash. Once clean, lay out seeds on a paper towel in a single layer for drying. Be sure to use a marker to label what the variety is, especially if you are saving multiple plant seeds. Once seeds are completely dry, place in a packet and label them clearly.
Personally, I’ve found that flowers tend to be the absolute easiest seeds to save because you don’t have to wait for them to flower since that’s where all their effort goes into. All that’s really needed is to snip a decent length of the stem, tie in a bouquet with cooking twine, stick in a brown lunch bag and then hang up in a closet somewhere to dry. Once the flower heads are completely dry, simply pop them in half and you will have numerous little seeds for the next season. Be sure to label both the brown paper sack and the final packet.
By no means have I given extensive instructions here for seed saving of all varieties and species, so do your home work and get to reading or watching videos so that you can get as much knowledge about the subject as possible.
Before I wrap up my article, I’d like to drop a few links for you to check out to see just what kind of uphill battle the people of Mexico and others are fighting in an effort to save heirloom varieties.
– The Fight to Save Mexico’s Heirloom Corn
– BBC: Saving the Nation’s Seeds From Extinction
– The War on Heirloom Seeds
As always, if you have any questions that you want to send over to me feel free to do so and I’ll answer them to the best of my ability. I’ve added a list of items I personal use that might help you in your journey as well.
- 4×6 Black Card Index Box
- Brown Paper Sacks
- Kitchen Cooking Twine
- Brown Kraft Envelopes (for seed saving)
- Small Strainer (for mucilaginous seeds)
- Gardening Shears
- 4×6 Photo Storage Case (FYI: If you have a Michaels craft store nearby, this is currently on sale for $14.99 and you can have it scheduled for curbside pick up. This is the current sale price as of 1/30/2022 and will most likely change soon.)
**Obligatory Notice: Some of the links contained on this site are affiliated links which earn me a meager percentage back when you purchase items for yourself which allows me to be a SAHM mom. Thanks! **
